Common Kanji Character Ranges for XNA SpriteFont Rendering

Note : This sample is practically useless, because the XNA Localization sample has a much better alternative using the Content Pipeline and character detection from resource files, which works for any language (Chinese, Korean, Japanese…). But I guess if you wanted to get the ranges of common Kanji, here’s how.

While working on Japanese language support in XNA, I realized a couple of things about Japanese writing (some of which may seem obvious, but wasn’t for me) :

  • There’s two broad character sets : Kana (syllabic) and Kanji (logographic)
  • Kana has two modern subsystems or components, Hiragana and Katakana, each with two distinct Unicode regions of respectively 92 and 95 different glyphs (187 total)
  • Kanji originate from Chinese “Han” characters, and are stored within the CJK (Chinese, Japanese, Korean) portion of Unicode. But CJK characters don’t uniquely reference Japanese logographs, and it contains over 20000 glyphs!
  • There’s over 10000 actual Japanese kanji, but only about 2000 of which every high-school grade Japanese person should know

In XNA, the SpriteFont class and its associated content pipeline use bitmap fonts internally to cache and render text strings. It becomes obvious that generating a bitmap font with 20000 Han characters would take a very long time, and is also very irresponsible memory usage. Even 10000 characters seems ridiculous.
I wanted to keep using SpriteFonts, so switching to a realtime font rendering option like FreeType was out of question. So how does one make bitmap fonts usable in Japanese?

While researching the subject, I stumbled upon a whitepaper called “Unicode and Japanese Kanji” by Tony Pottier, in which he discusses how to isolate Japanese Kanji from the CJK characters, and even dresses a list of all 1946 unique characters that are learned in Japanese education up to grade 7 (sorted by Unicode point, or by learning grade). Even if it’s a large amount of glyphs, it’s a lot more reasonable than 10k.

So the only remaining step is to make this table into a a list of XML CharacterRegion elements so that we can use them in an XNA SpriteFont declaration.
I made a little C#3 program that takes a list of Kanji, one per line, and blurts out the expected XML; it also joins the succeeding characters into regions to save space.

using System;
using System.IO;

namespace KanjiFinder
{
    static class Program
    {
        static void Main()
        {
            var output = new StreamWriter("regions.xml");
            var input = File.ReadAllLines("kanjis.txt");
            var writeCount = 0;
            var intervalsCount = 0;

            var start = (int)char.Parse(input[0]);
            var end = start;
            foreach (var line in input)
            {
                var cur = (int)char.Parse(line);
                if (cur - start > 1)
                {
                    output.WriteLine(string.Format("<CharacterRegion><Start>&#x{0:X4};</Start><End>&#x{1:X4};</End></CharacterRegion>", start, end));
                    writeCount += end - start + 1;
                    start = cur;
                    intervalsCount++;
                }
                end = cur;
            }
            output.WriteLine(string.Format("<CharacterRegion><Start>&#x{0:X4};</Start><End>&#x{1:X4};</End></CharacterRegion>", start, end));
            writeCount += end - start + 1;

            output.Close();

            if (writeCount != input.Length)
                throw new InvalidOperationException();
            Console.WriteLine(intervalsCount);
        }
    }
}

Here’s its input kanjis.txt (in Unicode format), and its result is regions.xml.

I chose to go up to Grade 7, but one may choose to ignore Grade 7 characters and just do 1-6. I don’t know whether Grade 7 characters are useful in game menus and usual dialogue.

All that’s left is to put those regions in a <CharacterRegions> tag inside a .spritefont file, and supply a valid Japanese font! Thankfully, Windows 7 comes with a bundle of these (MS Gothic, Kozuka, Mieryo and Mincho) and the M+ Fonts offer a public domain alternative.

Apart from the Kanji regions list, a couple more regions you’ll probably need :

<!-- Ideographic Symbols and Punctuation -->
<CharacterRegion><Start>&#x3000;</Start><End>&#x303F;</End></CharacterRegion>
      
<!-- Hiragana -->
<CharacterRegion><Start>&#x3040;</Start><End>&#x309F;</End></CharacterRegion>   
      
<!-- Katakana -->
<CharacterRegion><Start>&#x30A0;</Start><End>&#x30FF;</End></CharacterRegion>   
      
<!-- Fullwidth Latin -->
<CharacterRegion><Start>&#xFF01;</Start><End>&#xFFE6;</End></CharacterRegion>   
<!-- and/or the standard Latin set... -->
<CharacterRegion><Start>&#32;</Start><End>&#126;</End></CharacterRegion>

That’s it! Hope it helped.

Reflective Floor

Nov. 13th Update : Added fresnel term, min/max reflection factors, pixel-perfect sampling.

Back in TV3D land for a minute!

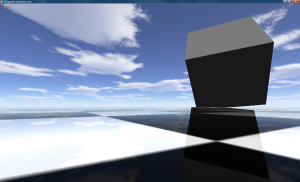
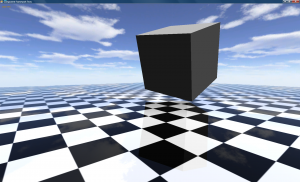
bigpic1bigpic2

(the reflection looks offset in these pics but it’s fine in realtime… not sure why it messed up here.)

Description

It might sound like an easy thing to do, but planar reflections are pretty challenging to do per-pixel. It involves a texture projection shader, some pretty scary matrix play, and so on and so forth. So I decided to make a proper sample that shows how I did it in my reflective water sample, but in its simplest expression.

The floor uses two mesh groups, one for the reflection and one for the actual floor with texture. This makes it possible to only use a shader on the reflection group, and then the other one uses standard TV3D rendering.
Sadly, it’s impossible to do per-pixel reflections without a shader. Thinking about it, an even simpler way would be to use the stencil buffer, but then if you’re working with pixels you can apply fun effects like bump-mapping and fresnel attenuation.

Update Notes

The updated version has fresnel per-pixel attenuation, which means that grazing angles will get full reflection and looking down on the floor will get next to none. The amount of reflection and the effect of the fresnel term can be tweaked with constants.
In order to make this thing work, I had to make it 3-pass :

  1. The first pass is the standard texture mapping one, without shader;
  2. The second pass multiplies the inverse of the fresnel term with the texture-mapped mesh, so that the reflection won’t be overpowering when we blend it in;
  3. The third and last pass additively-blends the reflection with fresnel applied.

The two last passes use the shader, but since both shader passes are enabled, I only need a single group for both. Nice and clean!

I also removed the texel offset thing because if you point-sample the texture (which you should, unless you’re bump-mapping), it’s pixel-perfect without any needed fix. And the blending modes and depth-write flags are moved to the shader, to make things even cleaner!

Download

Binaries + Code : PlaneReflection_src_bin.zip (8.7 Mb – C#3 VS2008 Solution)

Just the code : Projection.fx (the shader) and PlaneReflection.cs (the component that draws everything)

Enjoy!

Squaring The Thumbsticks

Update (Oct. 26th) : Better interpolation = better shaping, and the simpler “inscribed square” method.
Update (Nov. 4th) : Exact and customizable solution!

The input values of thumbsticks on an Xbox 360 controller are always contained inside the unit circle, a disk centered on the origin and whose radius is 1. This is usually fine, because you want to interpret the values as a vector inside that circle… but if you want to provide an analog version of a D-Pad, for instance to control a character in a 2D platformer, then you’ll find that your character will never reach maximum horizontal speed unless you hit the (1, 0) or (-1, 0) vectors, exactly right or left. Anything tilted up or down will give a fractional speed, and if you hit a diagonal corner, you’ll end up with ±√½.

So what if the analog stick was a square area instead, such that the entire circumference has a least one component maxed out, like the contour of a square?
It may seem like a simple thing to do, but it proved to be a lot of trouble, and in the end I chose to use an approximation (nope, it worked out in the end!)… but here’s how I researched the problem.

Attempt #1 : Wrong way around

I first googled “Mapping circle to square“, and ended up on a blog entry that describes the inverse transform. Fine, I’ll just invert it, isolate the x and y variables as a function of x’ and y’… But that proved to be a problem.

Wolfram|Alpha doesn’t know what to do with it, and after making it more manageable (for x, for y), it gives 4 different answers that seem to work only for specific intervals, but doesn’t say which…
I tried doing it by hand and was stuck early on, because I suck at this.

And since I don’t have access to (nor know how to use) proper nonlinear equation solvers, I decided to give up.

Attempt #2 : Projections

By googling some more and varying search terms, I stumbled upon a cool flicker image titled “Conformal Transformation: from Circle to Square“. That’s exactly what I need!
But alas, it involves something called elliptic integrals and this also goes beyond my math understanding, or the amount of effort I was willing to put in this. The description also links to the Peirce quincuncial projection, which maps a sphere to a square, but the math also goes above my head (complex numbers arithmetic and again, elliptic integrals).

At this point I realized that what I was trying to do was not trivial.

Attempt #3 : Intuition serves best

So I just went back what I usually do : analyze the problem, determine what I expect as a basic solution, and work my way there.

  • Problem : The smallest horizontal component I end up with is ±√½, or ±~0.707, when the θ angle is π/4, 3π/4, 5π/4 or 7π/4.
  • Solution : Scale this to ±1, so by a factor of √2.

The scale for angles close to diagonals should fall down to identity (1) when it reaches a cardinal direction, though I’m not sure about the interpolation curve… Linear should do fine?

(code removed because it’s kinda shitty)

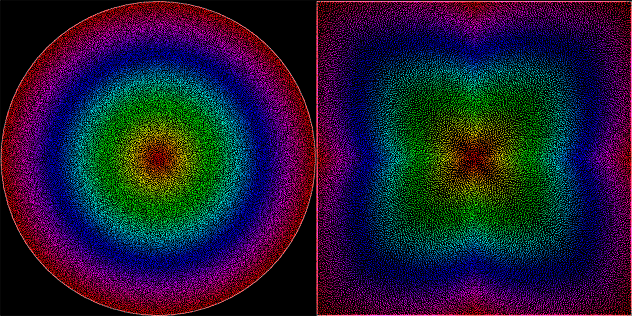
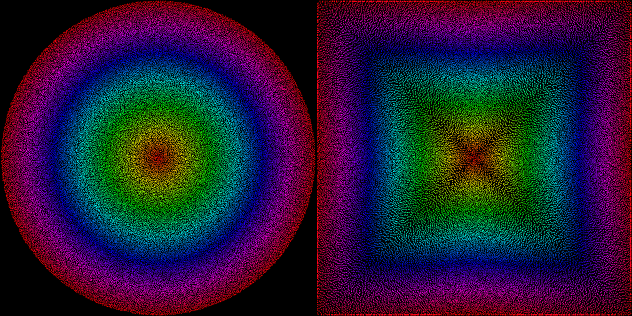
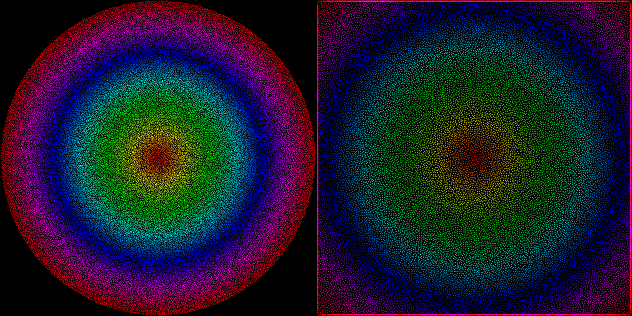
And for additional fun and testing, here’s how evenly-spaced random points inside the unit disk stretch to the unit square using this function (points generated by my Uniform Poisson-Disk code) :

poisson
Linear interpolation

Not bad? Good enough for me.

Attempt #4 : Interpolation and variations

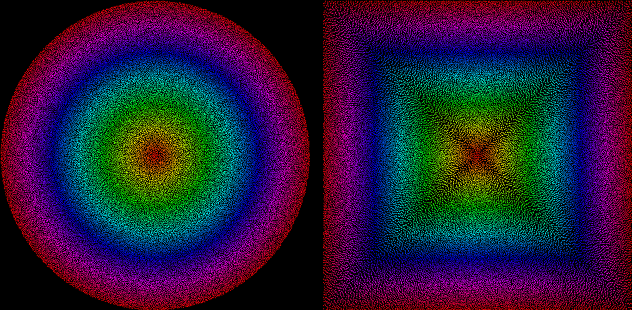
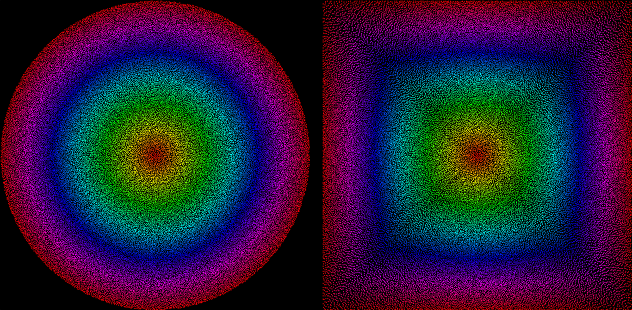
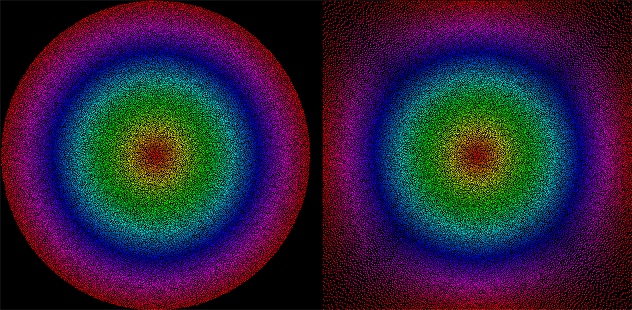
I then tried different interpolation/easing methods for the scaling factor, and tried raigan’s idea of just scaling and clamping linearly the circle to a square, here’s what it looks like!

poisson
Quadratic interpolation

poisson
Inscribed square

I tried sine, quadratic and circular ease in/out/in-out from my easing functions library, and quadratic ease-in was the most balanced. It almost shapes everything to a square, very little clamping is necessary, so I’ll keep that in.

The inscribed square method is nice and simple, but cuts off a lot of values and keeps circular gradients in its area. But in the real world, for 2D platformer input, it’s probably just fine…

Attempt #5 : Epic win

So, I decided to give another shot at this after speaking on the bus with a friend about polar coordinates and trigonometry. Turns out there is a more exact solution, and by adding a “inner roundness” parameter you can also tweak how much of the center input will remain circular, while still touching the sides for circumference values.

Here is my final C# function, then I’ll explain how it works :

static Vector2 CircleToSquare(Vector2 point)
{
	return CircleToSquare(point, 0);
}
static Vector2 CircleToSquare(Vector2 point, double innerRoundness)
{
	const float PiOverFour = MathHelper.Pi / 4;

	// Determine the theta angle
	var angle = Math.Atan2(point.Y, point.X) + MathHelper.Pi;

	Vector2 squared;
	// Scale according to which wall we're clamping to
	// X+ wall
	if (angle <= PiOverFour || angle > 7 * PiOverFour)
		squared = point * (float)(1 / Math.Cos(angle));
	// Y+ wall
	else if (angle > PiOverFour && angle <= 3 * PiOverFour)
		squared = point * (float)(1 / Math.Sin(angle));
	// X- wall
	else if (angle > 3 * PiOverFour && angle <= 5 * PiOverFour)
		squared = point * (float)(-1 / Math.Cos(angle));
	// Y- wall
	else if (angle > 5 * PiOverFour && angle <= 7 * PiOverFour)
		squared = point * (float)(-1 / Math.Sin(angle));
	else throw new InvalidOperationException("Invalid angle...?");

	// Early-out for a perfect square output
	if (innerRoundness == 0)
		return squared;

	// Find the inner-roundness scaling factor and LERP
	var length = point.Length();
	var factor = (float) Math.Pow(length, innerRoundness);
	return Vector2.Lerp(point, squared, factor);
}
square
Inner roundness = 0

round
Inner roundness = 1

rounder
Inner roundness = 5

There are two concepts here :

  1. The scaling factor can be calculated for every theta angle without any need for interpolation. It happens to be the inverse of the sine or cosine of the angle, depending on which wall you’re trying to clamp to. This gives a perfect square all around.
  2. By interpolating relatively to the length of the input vector, it’s possible to preserve the circular shape in the center and still clamp to the sides for extreme inputs.

I think I’m done with this now! Yay.

A Render/SamplerState Stack and Manager for XNA

I’ve been meaning to make something like this for a long time, and I know that some engines like Xen offer a viable solution already, but I wanted to make my KISS solution that interferes with the standard XNA interface as little as possible.

It’s a pretty lengthy snippet of code, so I won’t paste it all here, but basically there’s three classes : the StateStack, ManagedRenderStates and ManagedSamplerStates.

Description

StateStack is a static extension class to the GraphicsDevice. It could be just another static class, or even a global XNA service, but since it’s going to be used in combination with the GraphicsDevice most of the time, I thought it was logical to use extensions.
You can push, pop and peek the current state, which takes and returns ManagedRenderState objects. It’s very similar to how OpenGL works with the attribute stack (glPushAttrib), except you don’t choose what you push, the entire state gets pushed/popped everytime. I didn’t think isolating states in categories was useful or natural in XNA.
The ResetState and CommitState methods are shorthands to the same methods in ManagedRenderState.

ManagedRenderState is like a wrapper over a RenderState object, such that it has the same interface : a read/write property for each render state and access to the SamplerState collection.
The difference is that it tracks changes to render states as you make them, marks properties as dirty and applies only what’s needed when you decide to Commit. The Reset method refreshes the object with the current state of the GraphicsDevice; this needs to be done at the beginning of every draw call, or everytime you think the state has been tampered with.

ManagedSamplerState does the same thing but for sampler states : addressing, filtering, etc. You don’t call Reset or Commit on it directly, it gets done automatically by its host ManagedRenderState.

I added blending mode and texture filtering helper methods to both State classes, because I end up using that a lot… and with proper state management, you don’t have to worry about redundant assignments! So you can be permissive and set everything you need, every time.

Usage

So what does it look like to use it?
The Game class needs to do some initialization and per-draw-call stuff first…

protected override void Initialize()
{
    GraphicsDevice.PushState();

    // Other stuff
    base.Initialize();
}

protected override void Draw(GameTime gameTime)
{
    GraphicsDevice.ResetState();
    SetDefaultRenderStates();

    GraphicsDevice.Clear(Color.CornflowerBlue);
    base.Draw(gameTime);
}

void SetDefaultRenderStates()
{
    var rs = GraphicsDevice.PeekState();

    rs.DepthBufferEnable = true;
    rs.SetBlendingMode(BlendingMode.Alphablending);

    rs.SamplerStates[0].SetFiltering(FilteringMode.Anisotropic);
    rs.SamplerStates[0].AddressU = rs.SamplerStates[0].AddressV = TextureAddressMode.Wrap;

    GraphicsDevice.CommitState();
}

Then to use the state stack, you don’t ever touch the GraphicsDevice.RenderState object : always use the Managed equivalent.

// Push a copy of the state on the stack
var rs = GraphicsDevice.PushState();

// Always-on-top, and don't disturb the depth buffer, and no culling
rs.DepthBufferFunction = CompareFunction.Always;
rs.DepthBufferWriteEnable = false;
rs.CullMode = CullMode.None;

// Commit changes
GraphicsDevice.CommitState();

// Draw some stuff
Draw();

// Pop back to the last state
GraphicsDevice.PopState();
// We are now back to the last state

Download & Conclusion

I think it makes a lot of sense to stack states in a component system, because each component can push its own local state and work with it, and just dispose it afterwards. Add this to dirty-checking to remove almost all redundant state changes, and you’ve got a very usable system!

The next step is batching draw calls to keep calls that use the same RenderStates together… in my system, this is left to the user’s discretion. Kevin Gadd presented a way of doing this (and many other things including threaded rendering) on his blog.

Another rather important note : ManagedRenderState contains a MaxSamplers constant that you can tweak depending on the number of sampler states you know you’ll use. Leaving it at 16 will make update/reset/refresh operations kind of slow… not sure yet if it’s noticeable.

And because of the immense amount of copy-paste that’s been needed to produce these classes, I can’t promise that it doesn’t have a typo or two… I haven’t tested every single state. But up to now, it works great, and I’ll update it if needed.

StateStack.cs (2 kb – C# class)
ManagedRenderState.cs (30 kb – C# class)
ManagedSamplerState.cs (7 kb – C# class)

Bonuses in the code files : a method to unpack a packed color from uint to Color, and a simplistic object Pool implementation (to eliminate garbage when stacking up states).

Hope you find it useful!

WaitUntil Component

Here’s a little something that I hope to use increasingly in the future : elements of functional programming to facilitate modification of state over time or game loops, without using threads all over the place. It’s nothing new, and there are other solutions (like Nick Gravelyn’s Interpolators and Timers), but I tried to make it as concise and generic as I could.

Here it is, more comments after the listing.

using System;
using Microsoft.Xna.Framework;
using Microsoft.Xna.Framework.GamerServices;

namespace Foo
{
    public class WaitUntil : IGameComponent, IUpdateable
    {
        public static Game Game { private get; set; }

        public static void GuideDisappears(Action onValid)
        {
            Game.Components.Add(new WaitUntil(_ => !Guide.IsVisible, onValid));
        }

        public static void TimePassed(float secondsToWait, Action onValid)
        {
            Game.Components.Add(new WaitUntil(waited => (waited as TimeKeeper).Elapsed.TotalSeconds > secondsToWait,
                                              (elapsed, waited) => (waited as TimeKeeper).Elapsed += elapsed,
                                              onValid, new TimeKeeper()));
        }
        class TimeKeeper { public TimeSpan Elapsed; }

        readonly Func<object, bool> condition;
        readonly Action<TimeSpan, object> whileWaiting;
        readonly Action onValid;
        readonly object state;

        WaitUntil(Func<object, bool> condition, Action onValid) : this(condition, ActionHelper.NullAction, onValid) { }
        WaitUntil(Func<object, bool> condition, Action<TimeSpan, object> whileWaiting, Action onValid) : this(condition, whileWaiting, onValid, null) { }
        WaitUntil(Func<object, bool> condition, Action<TimeSpan, object> whileWaiting, Action onValid, object state) 
        {
            this.condition = condition;
            this.whileWaiting = whileWaiting;
            this.onValid = onValid;
            this.state = state;
        }

        public void Update(GameTime gameTime)
        {
            if (condition(state))
            {
                onValid();
                Game.Components.Remove(this);
            }
            else
                whileWaiting(gameTime.ElapsedGameTime, state);
        }

        #region Stuff we don't care about
        public void Initialize() { }
        public bool Enabled { get { return true; } }
        public event EventHandler EnabledChanged;
        public event EventHandler UpdateOrderChanged;
        public int UpdateOrder { get { return 0; } }
        #endregion
    }

    public static class ActionHelper
    {
        public static void NullAction<T, U>(T t, U u) { }
    }
}

I ended up using basically a GameComponent, which means I need access to a Game instance to add it and remove it from the component collection. I decided to use a static field (that you assign in the Game’s constructor) to avoid passing it every time. It’s very unlikely that the Game instance will change or be destroyed… and I already static-ified it in my ServiceHelper earlier anyway.

I also wrote a couple (okay, two) static factory methods that are slightly fluent-interface-ey.

// (from the context of your Game class implementation)
{
    // Say "OK" when the guide stops being visible, like this?
    Components.Add(new WaitUntil(_ => !Guide.IsVisible, () => Console.WriteLine("OK!")));
    // ...or like this!
    WaitUntil.GuideDisappears(() => Console.WriteLine("OK!"));

    // And while we're at it...
    WaitForTwoSeconds();
}
void WaitForTwoSeconds()
{
    Console.WriteLine("Will wait for two seconds...");
    // ...recursive timers!
    WaitUntil.TimePassed(2, WaitForTwoSeconds);
}

I’ll probably add new factory methods as the needs arise, and make the class overall more useful, but I feel like it’s a good start.
I used the “GuideDisappears” method when a gamer signs out and I want to show a warning message using the Xbox Guide before going back to a sign-up screen… but since signing out is usually performed from the Guide itself, you have to wait for it to close before doing anything. This seemed like the simplest solution, and it works great.

Anaglyph Stereoscopic Rendering in First Person

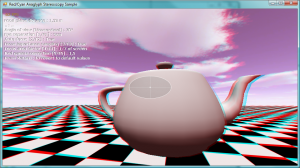
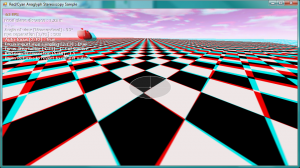
I decided to finally finish up my analgyph stereoscopy sample, and cut the depth-of-field component that was adding too much complexity for my limited spare time right now.

stereoscopy finalstereoscopy final 2

Download

Binaries : stereoscopy_bin.zip (1.9 Mb – Binaries)
Code : stereoscopy_src.zip (524 Kb – Source Only, get DLLs for TV3D and SlimDX from the Binaries)

Description

This sample demonstrates a couple of things :

  • Optimized anaglyph filters for red/cyan stereoscopic rendering, to reduce eye-strain by minimizing retinal revialry but still keep some color information. As my source suggests, I’ve also implemented red channel gamma correction in the shader.
  • Auto-focus of both eyes on a focal plane. The camera is in the first person and the two “virtual cameras” act like human eyes, in the manner that they are connected to a single brain that wants to look at a single point. So the center of the screen is assumed to be that focal point, and both eyes will look at it. I used a depth rendering pass to achieve this, and a weighted sum of a certain portion of the screen near the center (this is all tweakable in realtime)

The distance between the eyes is also tweakable, if you want to give yourself a headache.

I wanted to do a stereoscopy sample to show how I did it in Super HYPERCUBE, but I can’t/don’t want to release its source, so I just re-did it properly. Auto-focus is a bonus feature that I wanted to play with; sHC didn’t need that since the focal plane was always the backing wall.

This sample, like all my recent ones, uses the latest version of my components framework. There are some differences between this release and the Stencil Rendering one, but it’s mostly the same. The biggest thing is that base components (Keyboard, Sound, etc.) are not auto-loaded anymore, and must be added in the Core.Initialize() implementation. This way, if I don’t need the sound engine, I just don’t load it… makes more sense.

Hope you like it!

Stencil Rendering

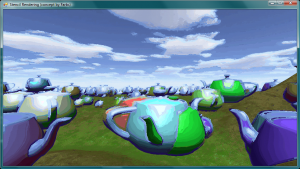
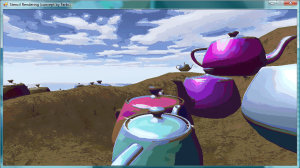
Here’s a little demo to show off a technique that Farbs posted about earlier this week.

yay yay2

Download

Binaries : stencilrendering_bin.zip (3.6 Mb – Binaries)
Code : stencilrendering_src.zip (1.8 Mb – Source Only, get DLLs for TV3D and SlimDX from the Binaries)

Description

Every frame, a random color from the target image is sampled. This color will be used as a stencil, such that every pixel whole target color is close enough to that stencil’s color will be painted. It’s a constructive painting process; every frame paints a single color, but if you wait long enough in a single spot you’ll end up with the target image.

Actually, the post processing draw code is so concise that I can post it here :

public override void PostDraw()
{
    targetBuffer.BltFromMainBuffer();
    targetBuffer.SetSystemMemCopy(true, true); // Lolworkaround

    // 1) Pick a colour from target image
    var pickedColor = Globals.DecodeRGBA(TextureFactory.GetPixel(targetBuffer.GetTexture(), RandomHelper.Random.Next(0, targetBuffer.GetWidth()), RandomHelper.Random.Next(0, targetBuffer.GetHeight())));
    stencilShader.SetEffectParamVector3("stencilColor", new TV_3DVECTOR(pickedColor.r, pickedColor.g, pickedColor.b));
    Screen2DImmediate.Draw_FullscreenQuadWithShader(stencilShader, 0, 0, 1, 1, mainBuffer.GetTexture(), targetBuffer.GetTexture());
    mainBuffer.BltFromMainBuffer();
}

“targetBuffer” and “mainBuffer” are just two TVRenderSurfaces as big as the viewport. Since I sample from targetBuffer, it needs to be flagged with “system memory copy”. I thought this would slow things down, but it runs at very interactive framerates (60 and more).

And uh… The “lolworkaround” is a bug in the current build of TV3D. Usually you only need to set this once at initialization time, but a BltFromMainBuffer does not flag the surface as dirty and it prevents updates to the pixels that I sample. Resetting the memory copy mode makes the changes effective. Sylvain tells me it’s fixed in the current development build. :)

A pixel shader does the rest :

float4 PS(PS_INPUT IN) : COLOR 
{
	float3 bufferSample = tex2D(MainBufferSampler, IN.TexCoord).rgb;
	float3 targetSample = tex2D(TargetSampler, IN.TexCoord).rgb;

	// 2) Calc difference between current screen and target (per channel subtraction, abs, then accumulate all three into one)
	float sampleDiff = distance(bufferSample, targetSample);

	// 3) As above, but between colour picked in step 1 and target image
	float stencilDiff = distance(stencilColor, targetSample);

	// 4) Where result of step 2 > result of step 3, draw colour picked in step 1
	float4 color;
	if (stencilDiff < sampleDiff)
		color = float4(stencilColor, 1);
	else
		color = float4(bufferSample, 1);

	return color;
}

I think it’s a lovely effect. It’s very dependent on how colorful and contrasted the scene is, and it works differently for sharply-defined shapes or gradients… And of course camera movement is a big factor. In the video it gets confusing, the effect is more “painterly” if you just rotate the camera in small circles and wait for the effect to accumulate.

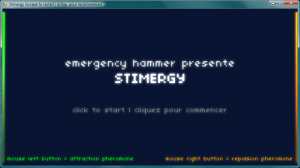
Stimergy

Stimergy is a game that I have made with Heather Kelley of Kokoromi for the Bivouac Urbain gamejam/competition last weekend in Québec city. Our team name was EMERGENCY HAMMER… don’t ask?

The point of the jam was to make a game in 3 days – 36 hours. And so we did.

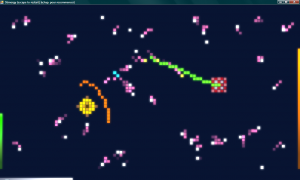
splash stimergy final

Download

stimergy_final.zip (2.1 Mb – Binaries)
stimergy_src.zip (471 Kb – Source Only, get DLLs for TV3D, SlimDX and IrrKlang from the Binaries)

I thought it was so cool that Petri used Chronolapse to film the making of his game Post I.T. Shooter, so I used the same thing for Stimergy :

Details

Heather did most of the game design, defined the graphics style and did the sound effects. I did the programming and some game design.

The game was made from scratch in C# 3.0 using the Truevision3D engine with no prior design, graphics or sound work. All the graphics in the game are procedural, and the gameplay itself is based on AI rules, basically a cellular automaton plus the notion of “stigmergy” from the insect world. (We dropped the G in the game title.)

I used a more recent version of my components system, which now has a sound interface via IrrKlang. It’s the same system I used for Super HYPERCUBE and Trouble in Euclidea, growing quite fond of it.

Goals

  • Guide the ants using suggestive pheromone trails towards or away from the picnic blanket, or killer antlions.

There are 4 levels. Each level has different goals, which are explained when it begins. Some have time limits. If you fail the objective, the level will restart until you get it.

Controls

Mouse Left Button : Attraction Pheromone
Mouse Right Button : Repulsion Pheromone

Escape key to restart the game from Level 1.

Requirements

This game uses the .NET Framework 3.5, installing it is mandatory. I suggest you install the SP1 version just in case.
You will also need a bunch of DirectX DLLs that are provided by the DirectX Web Setup.

Because of the fancy blur effect, the game requires a Shader Model 2.0 compatible graphics card. This type of card is fairly commonplace now.


Post Mortem


This was my first real rapid game prototyping experience. The shortest project span I had seen for a game before was about 15 days… so this was something else. Here’s a couple of random thoughts about that :

  • I need a proper system for timers and interpolators, similar to what Nick Gravelyn posted, or maybe just steal that. It’s really annoying to have a dozen TimeSpan variables to keep track of what changes over time and how long the transition lasts.
  • I need to learn other languages than C#, and other frameworks than TV3D/XNA. I’m making big efforts in my “engines” to cut down the redundant code, but even then I feel like I’m programming much more than is needed to describe the game mechanics.
  • A big part of what makes a game actually fun, is how much direct feedback you get from interacting in the gameworld, and how much you feel like you can control these interactions. Stimergy is a pretty slow game, almost an RTS (funny, because I hate this genre), and I’ve seen other competitors value the responsiveness of player input more than the complexity of game systems, and it ended up being a lot more fun. Maybe it just fit the “jam” context better, too.
  • I need a system for game screens. Something that puts game components in a context, that gives them lifetime. I tend to make all the major components global and automatically-loaded, which is the easiest way, but it makes game state management pretty hard. And it’s dangerous for memory usage. There’s actually a good XNA example that I just need to look at in detail.
  • If I’m going to do more 2D games in TV3D, I need to build something that will load GIF animations and non-power-of-two textures. Material management for stuff that changes color or opacity was kind of a mess too. I may need to wrap it in something more concise. Switching engine would probably be the more logical choice.
  • I spent silly amounts of time on tweaking graphical things that I ended up not using. This time would have been better spent balancing the difficulty level or adding more gameplay elements. I’m used to making demos look pretty,… I have to remind myself that I’m making a game here.

I may sound like I’m complaining about everything, but I’m actually really happy about how the game turned out. It’s fairly fun/challenging and it looks pretty good. I’m still wondering whether I’ll release the code because it’s kind of a mess. I suppose I will if I get a request. The source is available up in the Download section!

Fast Uniform Poisson-Disk Sampling in C#

Updated July 26th : Added a circle sampling method.

This appears to be tool-class weekend! Here’s another that I just finished up.

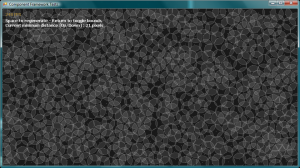
I’ve been wanting uniform poisson-disk distribution generation code for ages, ever since I started working with shadow map filtering in October 2006. I had difficulty decrypting the whitepapers that popped in the first results of Google at the time, so I just gave up for a little bit until… well… someone did a simple implementation for me to grab.

Thankfully, it happened!

The fine gentlemen at Luma labs (Herman Tulleken is credited for the class I converted) released a Java, Python and Ruby implementation of uniform and non-uniform poisson-disk sampling. It’s based on an oddly straightforward whitepaper by Robert Bridson at the UBC (in Canada!).

It took me under an hour to make it work in C#. This will prove very useful in my PCF filtering code, and I will be using it immediately in a Depth-of-Field shader I’m working on.

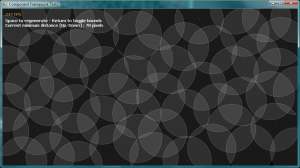
poisson disk 1poisson disk 2
poisson disk 3poisson disk 4
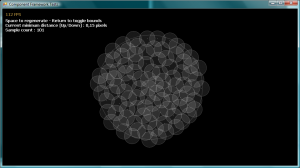
circle basedcircle based 2

Download

UniformPoissonDiskSampler.cs (4 kb – C# class)

This one uses Vector2’s from the SlimDX namespace, but it would be easy to just replace them with XNA Vector2’s or TV3D TV_2DVECTOR’s.

The original Java code used a non-static class, I decided to make it static and use structures for settings and state. This will reduce garbage if it’s used repeatedly, and since I send the structures as references, it’s just as fast as instance variables. I feel it’s a bit cleaner too.

The pointsPerIteration parameter defaulted to 30 in the original code, I did this too and it works well. You can reduce it to have potentially less dense distributions but much faster generation, or make it higher to make sure the whole space is filled.

Again, I won’t post a sample because the class usage is as simple as can be : it returns a List<Vector2> in the specified domain.

Enjoy!

Flash-style Tween/Easing Functions in C#

Easing functions make any movement look pretty. So you’re going to need them at some point.

And implementations are so widely available that you don’t have an excuse not to use them. I found this ActionScript reference to be very helpful in creating my own C# easing functions library, which I’d like to share… so here it is!

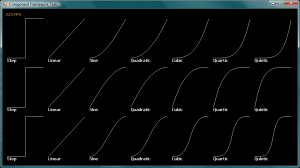
easing

First line is EaseIn, second is EaseOut, third is EaseInOut

Download

Easing.cs (4 kb – C# class)

It’s a static class and it’s framework-agnostic, completely standalone. The screenshot you see above is my TV3D test class. I won’t post the whole sample, but here’s the code if you want to see how I used it. In order to run, one would need a version of my components framework that I haven’t released yet.

I also didn’t implement each and every function that Robert Penner presents, just the ones I figured I’d use. Bounce and Elastic sound like physics to me, I don’t think I’d use easing functions to achieve that.