Here’s the third part of the “Behind Fez” series (part 1, part 2), in which I’ll try to explain how collision detection and physics work in Fez.
And yes, Fez is still actively developed in all areas. Making a game on your own : IT’S HARD.
Collision Engine as of Early 2008
Back when we made the IGF 2008 build, we had at least two massive limitations that made culling and collision detection very simple :
- The world was completely static. No moving platforms, no physics except for the player sprite, you can assume that if something is at one place at level-loading time, it’ll stay there until you quit the game. (as a matter of fact there WAS only a single level, but that’s another topic)
- Everything was aligned to the world grid. Everything took up a full cell worth of collision boundaries, nothing bigger or smaller than 16x16x16 trixels – exactly one trile.
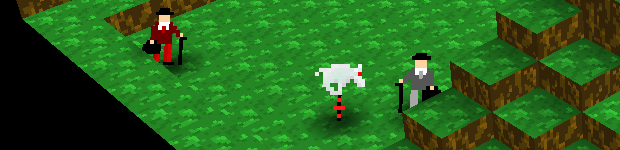
The super-blocky world of Fez circa 2008
This allowed me to only calculate collision detection of the player’s collision rectangle (for each of its 4 vertices, point-to-line) whenever it traversed a world grid “line”, and since this was done very rarely, optimization was not an issue, and I went with the most intuitive and naive way possible.
Consider the world as a 3D array (or whatever indexed data structure you can think of) with filled or empty spaces, and each filled space containing visual and physical information. Visual information consists of the polygonal mesh, the textures, etc. Physical information defines if that trile should collide with the player, and from which of its 2D boundaries.
We decided early on that the three possible “collision types” are : no collision, top-only collision (for fall-through/climbable platforms) and all-sides collision (for blocking level boundaries or obstacles).
The three different collision types as seen in Fezzer
This way of mapping world entities with their collision information is elegant because the level designer doesn’t need to paint a separate collision map, or add invisible objects that act as colliders. It also means that any change you make to the level visually is propagated physically to how it plays.
Fez is obviously played from a 2D perspective. The collision results must match what the player sees, and visibility works front-to-back, with only the top-most layer being visible and active.
Knowing the collision type of each and every space (if filled), it’s easy to find the 1D “row” of possible colliders if you have the 2D screen coordinates in hand. Then you just traverse front-to-back, and the first hit is kept, at which point you can early-out from the loop.
Depth “Collision”
So now I know what’s blocking the player in 2D. But we had to make additional rules for the Z position or depth of the player, so that the game would behave like a 2D platformer AND still make sense in the 3D world :
- Gomez should stay visible. He should stay on-top of the world geometry as long as he doesn’t rotate the viewpoint. This is done by correcting the depth such that Gomez stands right in front of the geometry.
- Gomez should never walk in mid-air. In 2D this is solved by the collision detection, but in the remaining axis it needs to be enforced, such that Gomez stands on the platform nearest to the camera (this is an arbitrary rule-of-thumb that we chose).
- Otherwise, don’t change Gomez’s depth for no reason. The player expects it not to change. It’s really easy to get lost in Fez, and if the engine messes up the little spacial perception you’ve got left, it’s not fair anymore.
A hilarious mock-up that shows rules 1 & 2 of depth adjustment
The player will never see that Gomez moves around in the Z axis because the view is flattened and it has absolutely no depth perception, so we can do all we want to ensure that rules 1 & 2 are enforced.
Breaking the Grid (Late 2008 to Late 2009)
So that was good until we decided to implement crate physics, moving platforms, offset triles and variable trile size. Then, this happened :
- Every rule defined above has to be tested every time the player moves. If the triles aren’t aligned to the world grid, the “only test when a grid line is traversed” trick won’t work anymore.
- For both culling and collision, the world grid stops being an exact reference of how the world appears/behaves, and more of a helper structure where more than one trile can be in a cell, and some triles overlap many cells.
- Collision stops being specific to the player, it needs to be generalized in order to support particles and other objects that should have all the same 2D/3D tricks.
The many joys of offset and oddly shaped triles
None of these problems is trivial, but the hardest by far to implement was #2. Thing is, I didn’t want to throw away everything I did and start over. So I made small, incremental changes until the new features were supported. And just by then I had ~1.5 years worth of C# code to maintain…
To explain my final approach, I need to specify that “variable trile size” does not mean that a trile can be bigger than 16x16x16, only that its collision volume can be smaller.
With that in mind, here’s what I did :
- A trile always has a majority of its volume within a single world cell, even if it’s oddly shaped or positioned arbitrarily. In other words, a single cell holds the center of a trile. This world cell is where it’s stored.
- When colliding a vertex of a collision rectangle to the world, look up the 4 nearest 1D “rows” (in 2D screen space) of possible collider cells from the world grid. Traverse front-to-back each of those rows, and test if one of the triles contained at each level ACTUALLY collides with the point, taking in consideration the trile’s positional offset and size. The 4 neighbour rows need to be tested because triles within these rows may exceed the cell boundaries by up to 50%!
- When triles move, update their location within the world grid only if the center changed to a new cell.
So everything’s covered, we’re good! Right?
Optimization
But it was slow as molasses. I do many, many more checks than I did before, and especially on the Xbox where the JIT compiler is less efficient, all those random accesses killed the game’s performance. Truly a case of CPU/Memory bottlenecking.
This section is a work-in-progress… As long as I’ll be maintaining/developing the game, I’ll worry about it going too slow. But here’s the steps I’ve taken up to now :
- After every camera rotation, cache the nearest and farthest trile for each screen-space world grid location. This way, I don’t have to loop through the entire level boundaries and test for trile presence, I know that within these cached bounds, I have data. Parts of the cache need to be invalidated every time an object moves. The caching process of the whole level has to be done in another thread while the rotation happens, else it pauses the game for ~250ms… And threading is a headache.
- Simplify the algorithm for particles and other small objects. The player won’t notice if particles physics aren’t 100% accurate; I can reduce the collision points to a single centered one, and ignore some rules.
- All the standard optimization techniques… Avoid dynamic memory allocations. Ensure cache spacial locality (still struggling with this one). Start up ANTS Profiler, find a bottleneck, eliminate it, rinse, repeat.
The problem with the world being so dynamic is that I can’t precache everything. I certainly can’t precache the collision result of every pixel of the screen everytime a viewpoint rotation occurs.
Separating dynamic objects from static objects and treating their collisions separately is something I’d like to try if necessary. But it means so many changes to the current system that it scares me a little bit.
Exceptions
In Mid 2008, we decided to implement something called Big Art Objects, which are like triles but bigger than 16³ (they can go up to 128³). They are sculpted like triles, but they don’t have any collision information attached to them, because they stick out of the “world grid” system.
A tree art object, with its collision triles faded in. (T = top-only, π = no-collide)
To make them look like they’re standard world objects, we fill them with invisible collision triles. (yes, I said we wouldn’t need those, but that’s a special case :P)
It’s worth it in the end, because they look fantastic and break the mold of lego-like blocky structures.
Another common exception is what we call immaterial triles. They’re no-collide triles that ALSO don’t make Gomez go in front of them. Strands of grass can pass in front of Gomez, it just looks better that way.
I could go on about the other exceptions, but then I’d reveal features that we haven’t announced or shown. So I’ll just stop now and let your imagination do the rest. :)